Thursday, December 2, 2010

Felt Rosette Ball Ornament (25 Days of Christmas No. 4)


 Hello! And welcome to tutorial number 4. As you can see above, this tutorial is not a tree skirt as promised yesterday. I know, I know, I'm horrible. You see, Riley and I had plans today and did not make it to Jo-Ann's Fabric to get some needed supplies for the tree skirt. (Excuses, excuses). So I thought today I would do an ornament! This here is a felt rosette ball ornament. I love it because it cost me about $.17 to make it. I got a pack of 6 foam balls at my local Dollar Tree and already had all the other materials and supplies. So, read on to see the $.17 ornament of the day;)

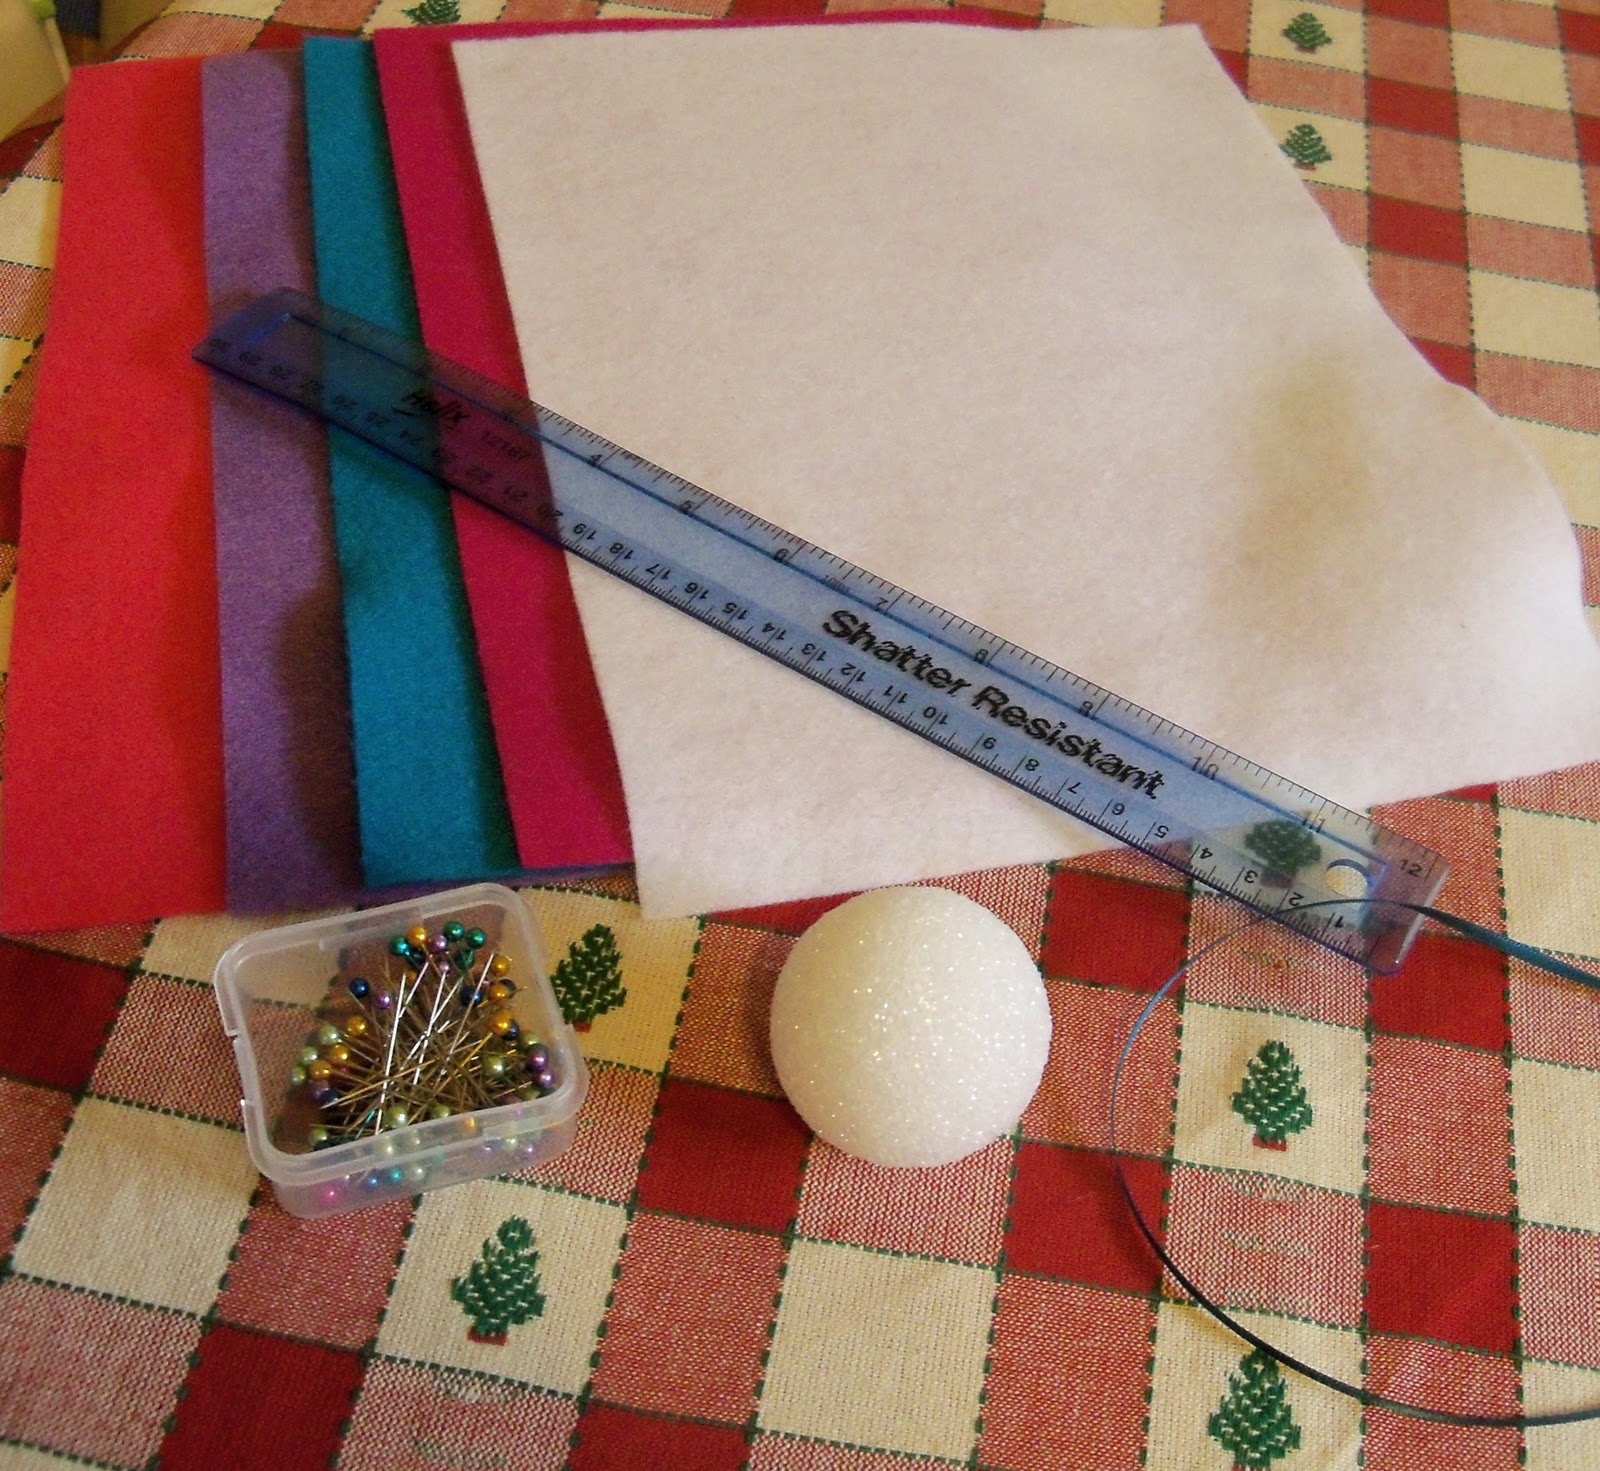
You will need:


  • A 2" foam ball
  • 5 pieces of felt cut into 10 6" circles
  • A piece of ribbon
  • Pretty strait pins (optional)
  • Hot glue gun
  • Ruler
  • Piece of paper
  • Pen
  • Scissors
Draw a 6" circle on your piece of paper and cut it out (it doesn't have to be perfect!).


Trace 2 circles per sheet of felt and cut them out.


Cut the circle into a spiral about 1/2" thick.


Roll the spiral with the inside of the spiral as the back of the flower and the outside of the spiral the "petals," if that makes sense:)


The middle part of the spiral will act as a backing. Hot glue it to the flower by only putting the glue around the perimeter of the flower (that way you can stick your pin in with no problem.)


Position, glue, and pin your flower to the ball.


Add a few more flowers all together if you'd like. I did four before I decided the project was working and I would add the ribbon.


Using a pretty big needle, thread your ribbon and insert the needle through the ball.

Tip: You may need to use needle nose pliers to pull the needle through. It can be a little tough.


Tie the back of the ribbon.

Tip: When you glue and pin the flower to the bottom, pin the ribbon down. Also do that on the top.


Tie the top of the ribbon into a loop and add the rest of your flowers!


There ya go! You now how a super easy (and cheap!) holiday ornament. This would be a great present!:)


Now, I don't want to give anything away, but this gives me a super delicious wreath idea. So, now I owe you a wreath and a tree skirt. Maybe I can hammer those out this weekend;)

Until next time, toodles!

Wednesday, December 1, 2010

[Almost] No Sew Burlap Tree Topper (Christmas in 25 Days No. 3)

Hello, hello! Before I start with today's tutorial, I have to show you one of the cutest pictures of Riley taken two days ago.


Look at that chocolatey mess! I promise I have never seen anyone get that messy eating a cookie! What he does is he digs the chocolate out with his fingers and eats it. He is such a choco-holic! (I wonder where he gets that from...?) ;) I wish I had a picture, but last night my dad had a Chocolate Eclaire for dessert and Riley got up from where he was sitting and RAN to my dad, who had the chocolate, of course! He asked my dad, "Please chocolate?" Ahh! Gotta love those moments:)

Now, on to the tutorial. A little side note: this didn't 100% go as planned, but it did work. You see, I think anything can be hot glued. Everything. I still think that, but sometimes it doesn't always go as planned. I hope you can tweak it as needed to get what you want out of it!:)


You will need:


  •  Burlap
  • A star template (Mine was about 13 in x 13 in- one of my metal stars that hangs on the wall)
  • Scissors
  • Wire cutters
  • Pliers
  • Sharpie(s)
  • Needle and thread
  • Hot glue gun
  • A metal hanger
  • Something to stuff the star with (grocery bags, fabric scraps, actual polyester stuffing, etc.)
  • Any ribbon, buttons, rhinestones, or other embellishments you want to add
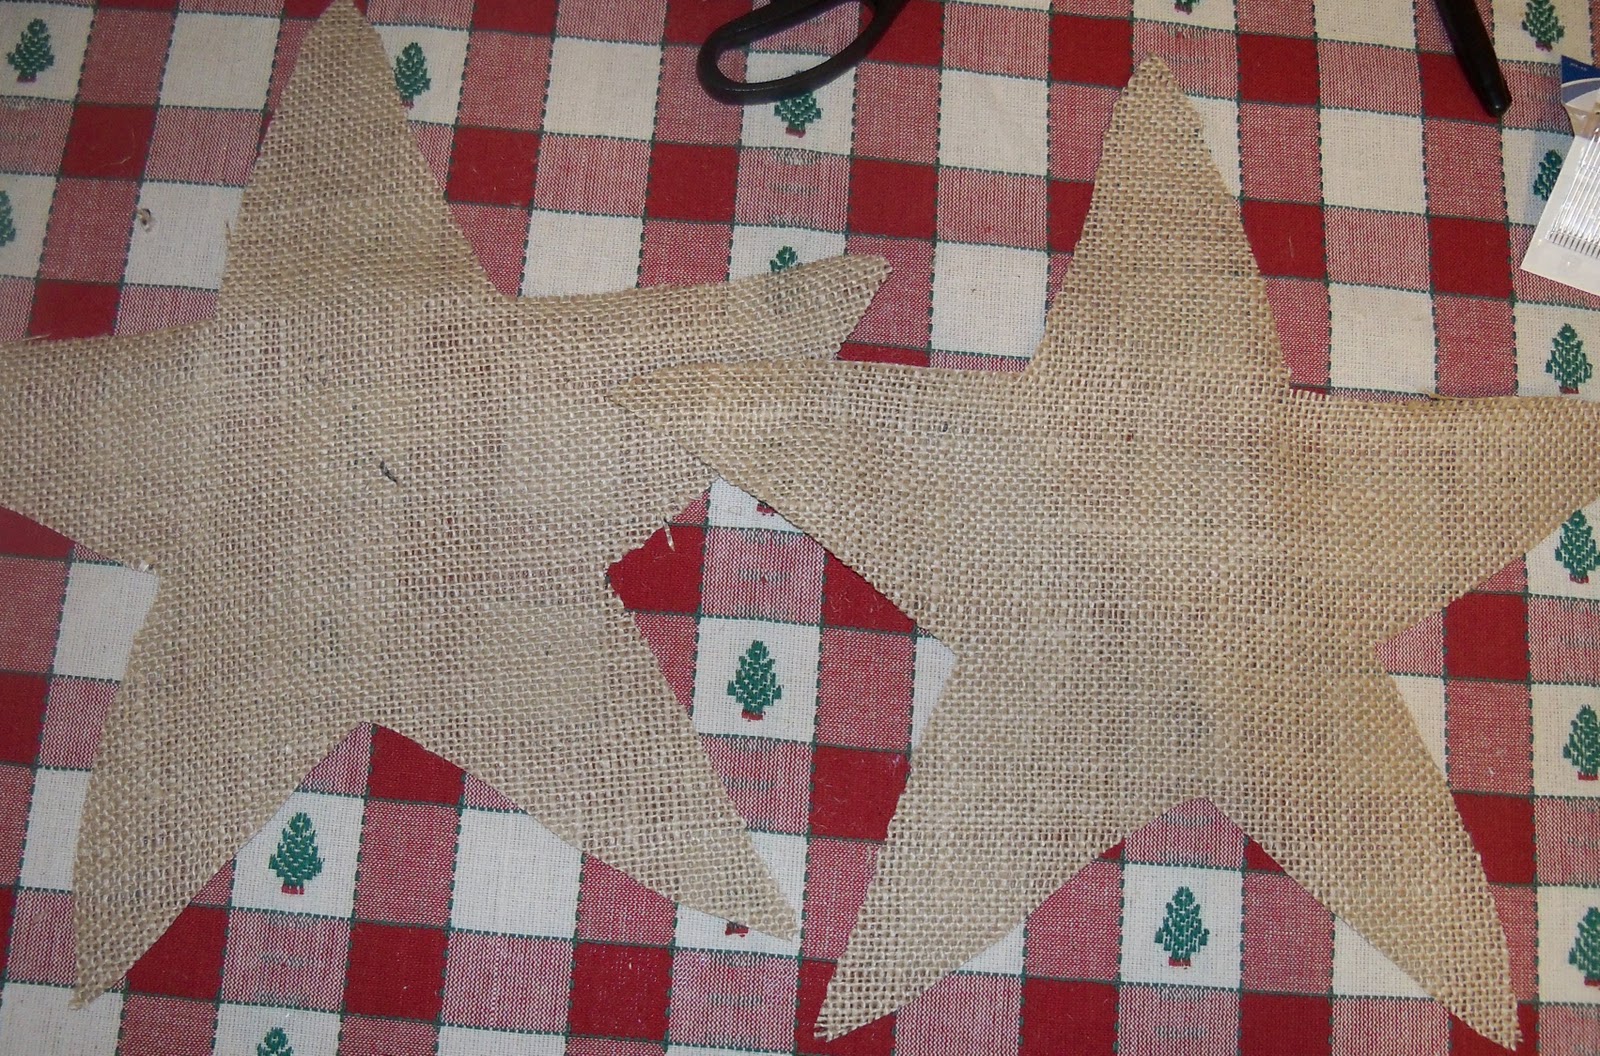
Fold your burlap in half (so you have two layers) and lay the star on top.


 Then roughly trace around the star allowing extra room.


Take your two stars apart.
I had the genius idea of "labeling" the back of the star, but ended up gluing it so one of the "B"s for "back" is showing.


 Hot glue all around the perimeter of your star, but leave one point open for turning the star "right-side-out" and for stuffing it.
Using burlap, it was kind of hard to turn it "right-side-out", so I used a pen to push the points out.


Stuff the star (I used grocery bags). I had also stitched the word "Rejoice" on the front of the star and added rhinestones for the dots on the "j" and "i".

You will also need to unwrap your wire hanger. Then, using your hands and the pliers, straighten it out. Once it's basically straight, shape it into a spiral that is smaller at the top and gradually gets bigger. You will then insert the wire where the "v" between the two bottom points on the star is and hot glue it in place.
I was so into working on this I did not take pictures of that step. If anyone has any questions please leave a comment below and I will do my best to help you out!:)


Then add the star to your tree!:) I felt like it was missing something, so I added some left over gold ribbon from the picture frame tutorial to it above "Rejoice."


I hope someone can get some ideas from this tutorial. Like I said, it wasn't the best, but I'm very happy with the way the star turned out. It is on the tree in the basement:) I'm thinking tomorrow's tutorial will be a tree skirt to match...

Until next time, toodles!

Tuesday, November 30, 2010

Easy Ribbon and Bells Door Knob Jingler (Christmas in 25 Days No. 2)

Just as the title states, this is a very easy, jingly way to decorate for Christmas. Growing up my mom had bells on every door (I just do the front door), but if you're someone who likes bells on every door during the holiday season, this is a cute, inexpensive way to get a lot of jingle!;) I had already made this back in October, but I thought it would be a cute tutorial. Here we go!


You will need:


  •  1 long piece of ribbon (I used a medium thickness white grosgrain)
  • Different color, size, and type of ribbons (I used a green, red, and white color scheme)
  • Bells
  • Pinking sheers (or scissors)
Lay out your longest ribbon. Mine ended up with on nice long crease in it when I tied all my other ribbon on. The crease makes it easier to tie on the door knob.


Take one of your other ribbons and a bell.

Thread one end of the ribbon through the loop on the bell.


And tie it in a knot!


Then attach it to your long piece of ribbon. I did my longest ribbons on either end and the shorter ones in the center.


Attach by tying a knot.


Use your pinking sheers (or scissors) to trim the ends of the ribbon.


And wa-la! You have a beautiful door jingle!


 Tip: If you cut the ends of your ribbons all differently (ie: slanted, in a "v", with pinking sheers, etc.) it will look less uniformed and precise.

Thanks for stopping by and checking out tutorial number 2! See ya tomorrow:)

Until next time, toodles!

Monday, November 29, 2010

Christmas in 25 Days, the ButterNugget Way! (No. 1)

Today around lunch time I had an idea to do 25 days of Christmas crafts starting today, November 29th, and ending on December 23rd. I will do my best to do one every day, but if for any reason I can't I will do two the next day:) So, here it goes!

Christmas craft number 1 is scrabble-inspired picture frames. It only cost me $1 to make one of them and at that price you can make them to fill your whole house!;) Or you can give them as thoughtful, crafty gifts. Let's get started, shall we!


You will need:


  • 3.5 in x 3.5 in unfinished frame from Michael's
  • Scrabble game tiles (I happened to get mine from my local Freecycle and my grandma. I know you can order replacement tiles from Hasbro, and different Ebay, and Etsy shops.)
  • Wax paper
  • Mod Podge
  • Hot glue Gun
  • Festive ribbon
  • Holiday scrapbooking paper and/or gift wrap
  • Foam brush
  • Nail file or emery board
  • Buttons, rhinestones or other embellishments
  • Scissors
  • A Sharpie and a pencil
 First you are going to take the frame out of the package and NOT LOSE the little dowel that comes with it;) Set out your wax paper to cover the work area.


 Next you will want to position your frame on the wrapping paper or scrapbook paper of your choice to get a feel for how you want it.


Next you will apply a thin, even layer of Mod Podge with your foam brush all over the front of the frame.


Lay the side of the frame you just applied Mod Podge to down on the paper the way you want it. Press down firmly. It will look all bubbly like this:


Use something (I used the dowel the frame came with) to smooth out all the air bubbles and around all the sides so the paper is firmly on the frame.


Next take your nail file and at a slight (about 45 degree) angel and run the file down against the edge of the frame. The paper will smoothly separate from the frame.
If you use scrapbook paper it will be a lot harder to file the paper off. Don't get discouraged, it will come off!


Poke a hole in the center of the frame (where the picture will go) and cut to each side and corner with scissors (like a pizza cut into 8ths). Cutting it like that is much easier than just poking a large hole, especially if you use thicker paper.


File from underneath the frame through the hole using a downward motion like before.


Trace the insert of the frame on a different, but coordinating, piece of paper. I used some left over scrapbook paper from a different project.


With your frame back on the waxed paper, apply a thin, even layer of Mod Podge all over the paper with the strokes all going the same way (ie: horizontal or vertical).


Let it dry.


While that is drying, position and hot glue your scrabble words or saying. Try to make the words 4 letters long max because 5 or more will not fit in the window of the frame.


Make some fabric rosettes.


Once the Mod Podge has dried, glue on the rosette and put the "picture" in the frame!
Side Note: See how the paper is still kind of crinkly? That is why I prefer to use thicker paper (scrapbook) rather than very thin (gift wrap).


Cut a length of ribbon. I used a medium thickness gold ribbon (I don't know the exact because it was floating around in my ribbon collection).


Glue the ribbon to the back of the frame how you like it. This ended up being too wide for me and I moved the pieces in closer.


With the same color paper I used for the "Joy/Noel" picture above, I covered my other frame to match:) I positioned "Happy Holidays" and a fabric rosette above the window.


And hot glued it on.


For the Christmas tree "picture" I traced around the window insert with a fine-tipped Sharpie and cut it out.


Then I folded green ribbon strips, which I also found floating around in my ribbon collection, twice to make a "V".


Then I positioned them on one of the dowels that came with the frame


And glued them one on top of the other (I did 3 layers, I just forgot to take a picture!)
Then I wrapped the tip that was showing in left-over gold ribbon and added a rhinestone on top (not shown).


Viola!


Thank you for taking the time to read my first tutorial! Please feel free to leave comments/feedback in the comment section below. I look forward to tomorrow's tutorial!:)

Until next time, toodles!